Jellyfin
The Jellyfin integrationIntegrations connect and integrate Home Assistant with your devices, services, and more. [Learn more] exposes a Jellyfin server as a media source in Home Assistant. This integration has been tested with Jellyfin server version 10.6.4 and later.
Configuration
To add the Jellyfin service to your Home Assistant instance, use this My button:

If the above My button doesn’t work, you can also perform the following steps manually:
-
Browse to your Home Assistant instance.
-
In the bottom right corner, select the
Add Integration button. -
From the list, select Jellyfin.
-
Follow the instructions on screen to complete the setup.
The URL of the Jellyfin server. Please supply the full URL including the protocol and optional webroot. For example https://media.example.com, http://10.1.1.100:8096 or http://home.example.com/jellyfin.
Options
To define options for Jellyfin, follow these steps:
-
In Home Assistant, go to Settings > Devices & services.
-
If multiple instances of Jellyfin are configured, choose the instance you want to configure.
-
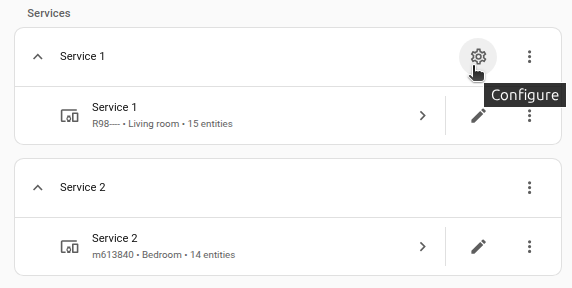
On the card, select the cogwheel
. - If the card does not have a cogwheel, the integration does not support options for this service.
-
Edit the options, then select Submit to save the changes.
Entities
Media player entities
This integration sets up every media session connected to the Jellyfin server as a media player in Home Assistant. These entities display media information, playback progress, and playback controls.
Remote entities
This integration also creates a remote entityAn entity represents a sensor, actor, or function in Home Assistant. Entities are used to monitor physical properties or to control other entities. An entity is usually part of a device or a service. [Learn more] for sending Jellyfin remote commands to each client, if supported. For example, the following script can be used to tell the client to navigate right twice, down once, and select the focused item:
alias: "Jellyfin Remote Script"
sequence:
  - action: remote.send_command
    target:
      entity_id: remote.jellyfin_client
    data:
      delay_secs: 1.5
      command:
        - MoveRight
        - MoveRight
        - MoveDown
        - Select
List of actions
The Jellyfin integrationIntegrations connect and integrate Home Assistant with your devices, services, and more. [Learn more] provides the following actions. Each link below opens a dedicated page with examples, parameters, and a step-by-step UI walkthrough.
-
Play media shuffled (
jellyfin.play_media_shuffle) Start playing a Jellyfin directory shuffled, replacing the current play queue.
For an overview of every action across all integrations, see the actions reference.
Jellyfin media player entities also support the following shared media player actions, depending on the capabilities of the Jellyfin client:
- Browse media
- Search media
- Play specified media
- Play media
- Pause media
- Play/Pause media
- Stop media
- Seek media
- Set media player volume, if the client supports setting the volume
- Turn up media player volume and Turn down media player volume, if the client supports setting the volume
- Mute/unmute media player, if the client supports muting and unmuting
Jellyfin supports the next and add enqueue options for the Play specified media action. The play and replace options replace the current play queue, as if enqueue was not set. The selection of media_content_type is generally inconsequential to Jellyfin, and any string can be supplied here to pass validation.
To find the media_content_id of the content you want to play, browse or search your library with the Browse media and Search media actions.
Jellyfin automation examples
The following examples show actions you can add to an automation or script to play Jellyfin media. Replace the media_content_id values with IDs from your own Jellyfin library.
You don’t need to edit YAML to use these examples. Copy a YAML snippet from this page, open the automation editor in Home Assistant, and press Ctrl+V (or Cmd+V on Mac). Home Assistant automatically converts the pasted YAML into the visual editor format, whether it’s a full automation, a single trigger, a condition, or an action.
Automation: Play a movie
Play a movie on a Jellyfin client that supports playback.
-
Action: Play media
-
Target: Living room (
media_player.living_room) -
Media content ID:
a982a31451450daeda02c89952e6d7cf -
Media content type:
movie
-
Target: Living room (
YAML example for playing a movie
action: media_player.play_media
target:
  entity_id: media_player.living_room
data:
  media_content_id: a982a31451450daeda02c89952e6d7cf
  media_content_type: movie
Automation: Queue an episode
Add a TV episode to play next on a Jellyfin client.
-
Action: Play media
-
Target: Living room (
media_player.living_room) -
Media content ID:
5ae55567cae75c26671a0a6b027bdd5b -
Media content type:
episode -
Enqueue:
next
-
Target: Living room (
YAML example for queueing an episode
action: media_player.play_media
target:
  entity_id: media_player.living_room
data:
  media_content_id: 5ae55567cae75c26671a0a6b027bdd5b
  media_content_type: episode
  enqueue: next
Known limitations
- Support is currently limited to music, movie, and TV show libraries only. Other libraries do not appear in the media browser.