Tado
The Tado integrationIntegrations connect and integrate Home Assistant with your devices, services, and more. [Learn more] platform is used as an interface to the my.tado.com website.
There is currently support for the following device types within Home Assistant:
- Binary sensor - for some additional information of the zones.
- Climate - for every Tado zone.
- Water heater - for water heater zones.
- Presence detection
- Sensor - for some additional information of the zones.
- Weather - for information about the current weather at the location of your Tado home.
- Switch - for controlling child lock on supported devices.
The Tado thermostats are internet connected thermostats. There exists an unofficial API at my.tado.com, which is used by their website and now by this component.
It currently supports presenting the current temperature, the setting temperature, and the current operation mode. The operation mode can be set to manual, auto, and off. If no user is at home anymore, all Tado zones show the away-state (Only with Tado assist mode). Manually switching between home-mode and away-mode is also supported. Manually switching to auto-mode is only supported with Tado assist mode. Any Tado climate card can be switched between these presence modes. This changes the setting for the entire home.
Configuration
To add the Tado hub to your Home Assistant instance, use this My button:

Tado can be auto-discovered by Home Assistant. If an instance was found, it will be shown as Discovered. You can then set it up right away.
If it wasn’t discovered automatically, don’t worry! You can set up a manual integration entry:
-
Browse to your Home Assistant instance.
-
In the bottom right corner, select the
Add Integration button. -
From the list, select Tado.
-
Follow the instructions on screen to complete the setup.
Connect with Tado
As of March 21st 2025, Tado has changed the authentication method. This means a few extra steps need to be followed to log in:
- When you set up this integration, the integration will set up a “Device Code” and provide a URL to Tado’s authentication server.
- Follow the URL and confirm the “Device Code” (normally it should be copied automatically).
- Follow the steps to log in and authenticate your account.
- Once the authentication is completed, go back to Home Assistant. Wait a few seconds for the loading screen to finish. You are now connected with Tado!
As of January 1st 2026, Tado is heavily rate limiting the API. The rate limit is based on a daily quota and is different per subscription type. If affected, the Tado integration will fail to authenticate and/or receive new data. This will result in the integration not working. The reset time is 12:00 CET.
Consider using a custom polling interval suiting your needs.
Migrate to new authentication method
By default, the integration detects when re-authentication is needed for the new login method and prompts with a re-authenticate action. Follow the steps described under Connect with Tado.
Unsupported device types
New Tado X devices are not supported by this integration, they have to be used through the Matter integration.
Presence detection
The Tado device tracker is using the Tado Smart Thermostat and its support for person presence detection based on smartphone location by geofencing.
This tracker uses the Tado API to determine if a mobile device is at home.
By default the Tado device tracker will track all devices known to Tado associated with your home. The Tado app needs to have the Geolocation permission enabled for the device to be tracked.
Your device has to be at home at least once before showing up as home or away. Polling Tado API for presence information will happen at most once every 30 seconds.
Beware that the Tado (v2) API does not provide GPS location of devices, only a bearing, therefore Home Assistant only uses home/not-home status.
Data updates
The integration normally updates every five minutes. For more detailed steps on how to define a custom polling interval, follow the procedure below.
Defining a custom polling interval
If you want to define a specific interval at which your device is being polled for data, you can disable the default polling interval and create your own polling automation.
To add the automation:
- Go to Settings > Devices & services, and select your integration.
- On the integration entry, select the
. - Then, select System options and toggle the button to disable polling.
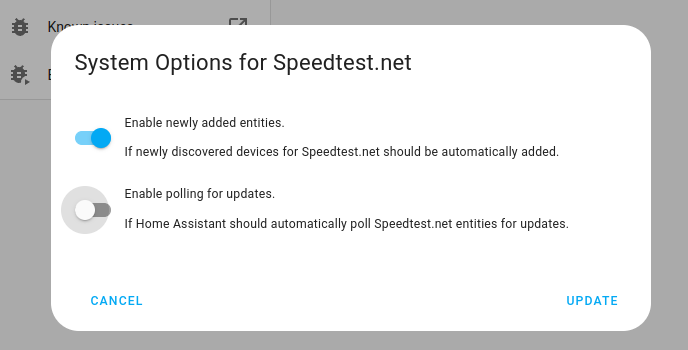
- Then, select System options and toggle the button to disable polling.
- To define your custom polling interval, create an automation.
- Go to Settings > Automations & scenes and create a new automation.
- Define any trigger and condition you like.
- Select Add action, then select Other actions.
- Select Perform action, and from the list, select the
homeassistant.update_entityaction. - Add the entities you want to poll to the Entity field. The
homeassistant.update_entityaction only supports targeting by entity. Selecting an area, device, or label is not supported.
- Save your new automation to poll for data.
List of actions
The Tado integrationIntegrations connect and integrate Home Assistant with your devices, services, and more. [Learn more] provides the following actions. Each link below opens a dedicated page with examples, parameters, and a step-by-step UI walkthrough.
-
Add meter reading (
tado.add_meter_reading) Adds a meter reading to Tado Energy IQ. -
Set climate temperature offset (
tado.set_climate_temperature_offset) Sets the temperature offset of Tado climate entities. -
Set climate timer (
tado.set_climate_timer) Turns on a Tado climate entity for a set time. -
Set water heater timer (
tado.set_water_heater_timer) Turns on a Tado water heater for a set time.
For an overview of every action across all integrations, see the actions reference.