ESPHome
Overview
The ESPHome integrationIntegrations connect and integrate Home Assistant with your devices, services, and more. [Learn more] allows ESPHome devices to connect directly to Home Assistant with the native ESPHome API.
ESPHome is a firmware generator and configuration system that enables the transformation of microcontrollers into fully customizable smart home devices. Using a simple YAML configuration file, ESPHome allows users to define hardware components like sensors, actuators, and peripherals. These configurations are then compiled into custom firmware that can be flashed onto the target device.
Key features
- YAML Configuration: Specify hardware components, sensors, actuators, and integrations using a clean and straightforward YAML syntax.
- Custom Firmware Generation: ESPHome compiles the provided configuration into a highly optimized, device-specific firmware image that is ready to be flashed onto microcontrollers.
- Seamless Integration: After flashing, ESPHome devices can integrate seamlessly with Home Assistant using the ESPHome native API. This documentation page focuses on the native API, which allows devices to communicate directly with Home Assistant for real-time automation and monitoring. For other integrations, such as MQTT or HTTP, please refer to the relevant sections of the ESPHome documentation.
ESPHome supports a variety of microcontrollers beyond just the ESP family. These include:
- ESP32: A powerful microcontroller with Wi-Fi and Bluetooth capabilities.
- ESP8266: A low-cost microcontroller with Wi-Fi support.
- BK72xx: A series of microcontrollers from Beken, commonly used in smart home applications.
- RP2040: A microcontroller developed by Raspberry Pi, known for its flexibility and cost-effectiveness.
- RTL87xx: A series of microcontrollers from Realtek, supporting various wireless communication protocols.
For a list of officially supported microcontrollers and devices, refer to the ESPHome device database. Keep in mind that this database represents only a portion of the ecosystem—many other devices and peripherals are supported but may not appear in the database.
For inspiration and examples of complete, ready-to-use configurations, check out the ESPHome ready-made projects. These include setups like Bluetooth proxies, which can extend the Bluetooth range of Home Assistant.
If you’re looking for pre-built solutions, the Voice PE is an excellent example. It’s a pre-built voice assistant device powered by ESPHome, offering an easy way to integrate voice control into your Home Assistant system. Many pre-built solutions, like the Voice PE, are open-source and can be customized, giving you flexibility to adapt them to your needs.
For detailed information on configuring unsupported or custom devices, consult the official ESPHome documentation, which provides in-depth guides on expanding and customizing your setup beyond the pre-configured devices.
Configuration
To add the ESPHome device to your Home Assistant instance, use this My button:

ESPHome can be auto-discovered by Home Assistant. If an instance was found, it will be shown as Discovered. You can then set it up right away.
If it wasn’t discovered automatically, don’t worry! You can set up a manual integration entry:
-
Browse to your Home Assistant instance.
-
In the bottom right corner, select the
Add Integration button. -
From the list, select ESPHome.
-
Follow the instructions on screen to complete the setup.
Required manual input
To configure an ESPHome device, enter the following information:
IP address or hostname of the ESPHome device.
This will be pre-filled if the device was auto-discovered.
Port used by the ESPHome native API (default: 6053).
This will be pre-filled if the device was auto-discovered.
The pre-shared key used for encryption.
This is a 32‑byte base64‑encoded string. Leave blank if native encryption is not enabled.
For more information, see the ESPHome Native API Component documentation.
Options
To define options for ESPHome, follow these steps:
-
In Home Assistant, go to Settings > Devices & services.
-
If multiple instances of ESPHome are configured, choose the instance you want to configure.
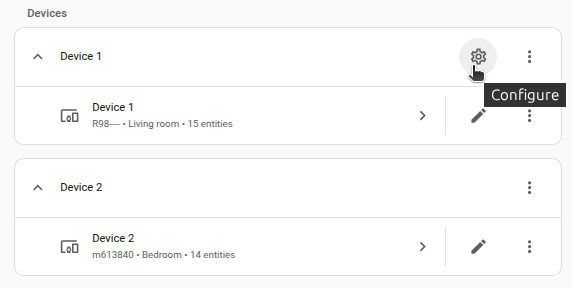
-
On the card, select the cogwheel
. - If the card does not have a cogwheel, the integration does not support options for this device.
-
Edit the options, then select Submit to save the changes.
These options are disabled by default and not required—only set them if specifically needed.
No/Yes
When enabled, ESPHome devices can perform Home Assistant actions, such as calling services or sending events. Only enable this if you trust the device.
Supported devices
The ESPHome integrationIntegrations connect and integrate Home Assistant with your devices, services, and more. [Learn more] works with devices that run ESPHome firmware and expose their functionality through the native ESPHome API. This API is designed for tight, efficient integration with Home Assistant, enabling ESPHome devices to push updates directly to Home Assistant in near real time.
Updating data
Rather than polling for sensor values or device states, Home Assistant maintains a persistent connection to each ESPHome device using the native API. This allows state changes—such as a temperature sensor update, a button press, or a binary sensor trigger—to be sent immediately as they happen, reducing latency and improving responsiveness in automations.
Additional technical details
- Efficient Communication Protocol: ESPHome uses a lightweight, bi-directional protocol over TCP, optimized for microcontrollers. This protocol is implemented in aioesphomeapi, the async Python library used by Home Assistant to handle real-time communication with ESPHome devices. It enables low-latency updates and near instant command execution.
- Automatic Reconnection: Home Assistant maintains a persistent connection to each ESPHome device and will automatically attempt to reconnect if the connection is lost. This includes support for “sleepy” or battery-powered devices that periodically wake from deep sleep. When such a device comes online, Home Assistant quickly re-establishes the connection—especially when mDNS (Multicast DNS) is available—allowing the device to be discovered and connected without requiring static IPs or manual configuration.
This real-time behavior enables fast, reactive automations and a smooth user experience compared to traditional polling-based integrations.
Supported functionality
Entities
The available entities depend on the components defined in the ESPHome YAML configuration for each device. These entities are exposed through the Native API Component.
Firing events on the Home Assistant event bus
When using the native API with Home Assistant, you can trigger events on the Home Assistant event bus directly from ESPHome. For more details, see the homeassistant.event Action.
Actions
Each device can define Home Assistant Actions based on its ESPHome YAML configuration. For more information, refer to the Actions section in the Native API Component documentation.
Retrieving data from Home Assistant
ESPHome can retrieve the state of Home Assistant entities using the Native API with User-Defined Actions.
Home Assistant actions
ESPHome devices can call any Home Assistant Action. This feature is not enabled by default for newly added devices but can be enabled through the options flow on a per-device basis.
Tag scanning support
The Native API Component also supports sending tag scan events to Home Assistant. See the homeassistant.tag_scanned Action for more information.
Bluetooth proxy scanning mode
For ESPHome devices running the Bluetooth proxy on a recent firmware, you can choose how the proxy scans for Bluetooth devices. The default is Auto, which is recommended for most setups. To change it, open the device in Settings > Devices & services, select Configure, and pick a Bluetooth scanning mode:
- Auto: Listens passively most of the time and only briefly switches to active scanning when a device or integration needs more details. Compared to running continuously active, this saves around 95 to 96 percent of the scan-related battery drain on your Bluetooth devices while still discovering devices and updates quickly.
- Active: Continuously asks devices for full information. Updates are the fastest, but it uses more battery on the devices around you.
- Passive: Only listens; never asks devices for extra information. Uses the least battery on your devices, but some details may be missing because some integrations need active scanning to work.
The first time Home Assistant connects to a proxy, the device’s YAML mode is honored if it was set to passive; otherwise the proxy starts in Auto. After that, the choice saved in Home Assistant takes ownership of the running mode and changing bluetooth_proxy: mode: in the device YAML no longer affects the running mode.
Entity naming and IDs
- Entity name is a combination of the friendly name (or name if unset) and component name
- Entity ID is derived from the entity name
- Unicode characters in names are transliterated to their closest ASCII equivalents for compatibility
Example with friendly_name set:
esphome:
   name: "livingroomdesk"
   friendly_name: "Living room desk"

sensor:
   name: "Temperature"
The entity will be named Living room desk Temperature and will default to having an entity ID of sensor.living_room_desk_temperature.
Example without friendly_name set:
esphome:
   name: "livingroomdesk"

sensor:
   name: "Temperature"
The entity will be named livingroomdesk Temperature and will default to having an entity ID of sensor.livingroomdesk_temperature.
Example with Unicode characters:
esphome:
   name: "haloszoba-klima"
   friendly_name: "Hálószoba klíma"

sensor:
   name: "Árvíztűrő tükörfúrógép"
The entity will be named Hálószoba klíma Árvíztűrő tükörfúrógép and will default to having an entity ID of sensor.haloszoba_klima_arvizturo_tukorfurogep. Note how the Unicode characters are transliterated rather than replaced with underscores.
Troubleshooting
Viewing live logs
To troubleshoot your ESPHome devices, you can easily view live logs, whether you’re using the ESPHome Device Builder or the ESPHome CLI. The logs contain detailed information such as Wi-Fi connection status, errors, and debug messages, which can help you identify and resolve issues with your device.
Using the ESPHome Device Builder
- In the ESPHome Device Builder app, find the device you’re working with.
- Click the LOGS button to open the log view.
Using the ESPHome CLI
If you’re using the ESPHome CLI, follow the instructions for the logs Command to access the logs.
Obtaining logs from the device
If you want the device to send logs without requiring you to be actively monitoring, follow these steps:
-
To have the device send logs to Home Assistant, in the options flow, enable
Subscribe to logs from the device.- They are logged under the
homeassistant.components.esphomelogger at the equivalent level.
- They are logged under the
-
To adjust the logging level, there are two options:
-
enable debug logging,
-
or use the Developer tools to call the
logger.set_levelaction to specify the desired level:action: logger.set_level data: homeassistant.components.esphome: debug
-
Reconfiguration and Device Replacement
This integration supports reconfiguration, allowing you to make changes—such as updating the IP address—even after a device has already been set up.
Name conflict resolution
If Home Assistant detects multiple devices with the same name, it will automatically initiate Name Conflict Resolution. This process is designed to help you seamlessly replace a failed or retired device with new hardware, while preserving your existing configuration if desired.
This process gives you two options:
- Migrate: Transfers the existing entity configuration to the new device. This preserves all your settings, entity names, and history. Use this when you’re replacing the hardware but keeping the same YAML configuration.
- Overwrite: Replaces the existing configuration with the new device. Caution: This will erase all existing settings for the old device including entity names, customizations, and history will be lost. Use this only if the new device is completely different and you don’t need anything from the previous setup.
If you’re using the same YAML file on the new device, choose Migrate. If it’s a totally different device (even if it shares the same name), Overwrite is the safer option.
Requirements for name conflict resolution
To trigger Name Conflict Resolution, all of the following must be true:
- The new device must be running ESPHome 2025.4.0 or later.
- The new device must use the same name (not just the friendly name).
- The original (old) device must be offline.
How to trigger name conflict resolution
You can trigger Name Conflict Resolution in several ways:
- Connecting a new device with the same name and a static IP address will automatically launch a repair flow.
- Using the Reconfigure option in the UI to point to a different IP that hosts a device with the same name.
- Configuring a newly discovered device that uses the same name.
- Manually adding a device with the same name via the integration setup.
Known limitations
Each ESPHome device must have a unique name. This name is important for mDNS announcements, ensuring that the device can be properly discovered, quickly reconnected when it comes online or wakes from deep sleep (for devices that support deep sleep), and correctly linked to the ESPHome Device Builder app. It’s also crucial for DHCP discovery if mDNS is not available.
Using duplicate names can lead to connection issues, failed discovery, and unexpected behavior with both the integration and the app for Home Assistant (formerly known as add-on).
Removing the integration
This integration follows the standard integration removal process; no extra steps are required.
To remove an integration instance from Home Assistant
- Go to Settings > Devices & services and select the integration card.
- From the list of devices, select the integration instance you want to remove.
- Next to the entry, select the three dots
menu. Then, select Delete.