Ubiquiti airOS
Ubiquiti UISP-range of wireless products offer a comprehensive suite of devices specifically designed for interconnecting various locations. As long as these airOS devices can ‘see’ each other without any (or limited) obstructions like buildings or trees, a stable and high-bandwidth “beam” can be established. Even their most cost-effective devices can achieve up to 450 Mbps real TCP/IP throughput and maintain reliable links up 10km range!
A common use-case is establishing wireless PtP or PtMP links between buildings, remote sites, neighbours or even your shed. This is highly advantageous when traditional fiber-optic or copper network cabling is either impractical or the distance is too far for copper cabling. With LoS between airOS devices, a stable and high-bandwidth “beam” can be established, eliminating any need for additional infrastructure. This can be an improvement over extending your WiFi coverage using meshing of Access Points, as meshing potentially reduces the capacity and performance of your WiFi network.
There is currently support for the following platforms within Home Assistant:
This integration allows users to pull network metrics and statuses directly into their Home Assistant dashboards, enabling advanced automation, notifications, and comprehensive network oversight within their smart home ecosystem.
Ubiquiti UISP products cannot be managed from their popular UniFi software. They are typically configured using a web browser, the UISP Mobile App, or the UISP platform (either Cloud or Self-Hosted.
Prerequisites
This integration only supports devices running airOS 6 or 8 and already configured using your browser or the UISP app.
Configuration
To add the Ubiquiti airOS device to your Home Assistant instance, use this My button:

Ubiquiti airOS can be auto-discovered by Home Assistant. If an instance was found, it will be shown as Discovered. You can then set it up right away.
If it wasn’t discovered automatically, don’t worry! You can set up a manual integration entry:
-
Browse to your Home Assistant instance.
-
In the bottom right corner, select the
Add Integration button. -
From the list, select Ubiquiti airOS.
-
Follow the instructions on screen to complete the setup.
Supported devices
While there is no known limitation to which devices running airOS firmware versions 6 or 8 are supported, success has been reported on the devices listed below.
Do you have a device that works? We’d love to hear your experience so we can add it to this list!
airOS firmware 6
- NanoStation M5 (NSM5)
- NanoStation M5 loco (LocoM5)
airOS firmware 8
- LiteAP GPS (LAP-GPS)
- LiteBeam 5AC (LBE-5AC-GEN2)
- NanoBeam 5AC (NBE-5AC-Gen2)
- NanoStation 5AC Loco (Loco5AC)
- PowerBeam 5AC: 620 (PBE-5AC-620) and Gen2 (PBE-5AC-Gen2)
Operating roles
Depending on the device’s placement, it will be configured as either an ‘Access Point’ (AP) acting as the central device or a ‘Station’ connecting as a client. An AP can have multiple stations connected to it, whereas a station typically connects to only a single AP.
For stations in particular, they can operate in either a ‘Bridge’ or ‘Router’ role:
-
In ‘Bridge’ mode, the default and most common configuration
- The airOS device simply bridges the wireless and wired connections. In simplistic terms, it functions as a transparent network cable, making it invisible to the devices on both the station and AP sides.
- This mode is ideal for extending a network’s reach without introducing new subnets or managing additional routing.
-
In ‘Router’ mode, the airOS device
- Acts as a small router, performing NAT as well as providing DHCP services for devices connected to its LAN port.
- Can also be configured as a PPPoE client, authenticating with a central PPPoE server to receive its IP address, gateway, and other network settings.
The choice between Bridge and Router mode depends on the network architecture and whether the device is intended to extend an existing network (Bridge) or create a new subnet (Router).
Button
Reboot
Disabled by default, can be enabled to provide a button to reboot the device.
Sensor
Network Role
Indicates the role of the device in your network, either ‘bridge’ or ‘router’ (see operating roles for more information.
Wireless Frequency
The base frequency set for this device.
Wireless SSID
The SSID (that is, the wireless network name) used by this device.
Download capacity & Upload capacity
Indicates the estimated maximum link capacity (bandwidth) for download and upload between devices.
Throughput receive and throughput transmit.
These sensors show the actual data transfer rate (receive and transmit) for this device.
Antenna gain
Performance in dB for the device antenna. See Gain on Wikipedia.
Update
Firmware updates are supported for devices running firmware v8. A link to the release notes is provided, and we strongly recommend reviewing them to avoid unforeseen consequences. Starting an update from Home Assistant will download the available firmware and begin installation on the device.
Updating firmware will interrupt connectivity. Always review the release notes to confirm compatibility and follow any upgrade order that Ubiquiti recommends for your local and remote devices. Update the correct side first to avoid losing access to a remote device, especially when it is physically far away or difficult to troubleshoot on-site.
Data updates
Device data is polled every 60 seconds. Firmware availability is checked once per day.
Examples
Detect link degradation
As both stations need to maintain LoS between each other, the greater their distance, the more likely something will occasionally obstruct the path. A construction site crane might be in the way, or your local window cleaners might have slightly tapped your Access Point, causing its antenna to become misaligned. While the link might still be operational, it will definitely not be providing the capacity it had before. This automation example will notify you of an unexpected change in your link’s capacity bandwidth.
This automation triggers when either the download or upload capacity reported by your NanoStation drops significantly below its expected performance level.
automation:
  alias: 'UISP NanoStation Link Capacity Warning'
  triggers:
  - trigger: numeric_state
    entity_id:
      - sensor.nanostation_5ac_access_point_download_capacity
      - sensor.nanostation_5ac_access_point_upload_capacity
    for:
      hours: 0
      minutes: 5
      seconds: 0
    above: 360000
  conditions: []
  actions:
    - action: notify.send_message
      metadata: {}
      data:
        message: "Point-to-Point capacity loss, please check your wireless links"
      target:
        entity_id: notify.notifier
The above currently caters for a 25% degradation of 450 Mbit/s. If you want to consider your actual capacity in a dynamic approach, we suggest looking into the Statistics integration.
Troubleshooting
Accessing the local device
If you need to configure the device directly, you can find the link to your device by:
- Go to Settings > Devices & services, and select your integration and device.
- On the device entry, select the link provided for the configuration URL (usually found next to the
icon). - Follow the instructions on your device’s web interface or consult the airOS 8 Manual (PDF).
Adjusting the update interval
The default interval is considered best practice. Updating too frequently may induce considerable load on your bridge(s) resulting in unexpected results or missing data.
If you want to define a specific interval at which your device is being polled for data, you can disable the default polling interval and create your own polling automation.
To add the automation:
- Go to Settings > Devices & services, and select your integration.
- On the integration entry, select the
. - Then, select System options and toggle the button to disable polling.
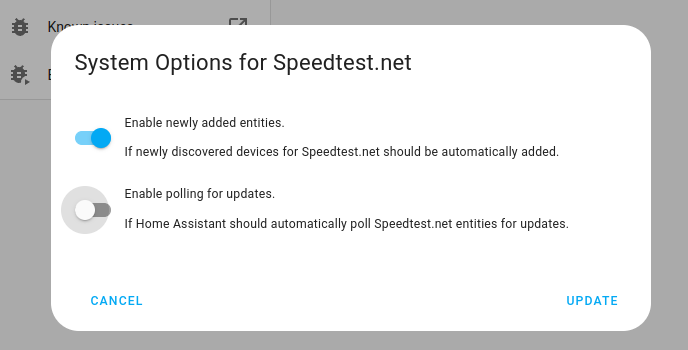
- Then, select System options and toggle the button to disable polling.
- To define your custom polling interval, create an automation.
- Go to Settings > Automations & scenes and create a new automation.
- Define any trigger and condition you like.
- Select Add action, then select Other actions.
- Select Perform action, and from the list, select the
homeassistant.update_entityaction. - Add the entities you want to poll to the Entity field. The
homeassistant.update_entityaction only supports targeting by entity. Selecting an area, device, or label is not supported.
- Save your new automation to poll for data.
Diagnostic data
If you need to create an issue to report a bug or want to inspect diagnostic data, use the below method to retrieve diagnostics:
- Go to Settings > Devices & services, and select your integration and device.
- On the integration entry, select the
. - Then, select Download diagnostics and a JSON file will be downloaded.
- You can inspect the downloaded file or, when requested, upload it to your issue report.
Removing the integration
This integration follows standard integration removal. No extra steps are required within Home Assistant or on your devices running airOS.
To remove an integration instance from Home Assistant
- Go to Settings > Devices & services and select the integration card.
- From the list of devices, select the integration instance you want to remove.
- Next to the entry, select the three dots
menu. Then, select Delete.